Search This Blog

Tuesday, November 30, 2021

Going waay back to Homework Assignment No 1

Yep, it's taken me a little bit to get this card posted. First my supplies (the perfect pearls ) had to arrive which wasn't till end of the class, figures. I had most of it done except for the beam of light and the sentiment. And then I had to complete the card and it's been a good week since I finished but the grandkids were here for a week and I took the time to enjoy them. 

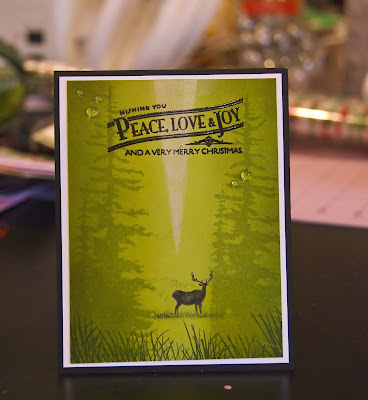
Basically for this card you use ink on a colored piece of cardstock (obvious green choice here) and then you make a triangle template and use white ink mixed with perfect pearls and dab/swipe the beam of light over your targeted subject. In my case it was an elk. I thought this would work nicely as I didn't have a nativity scene to use as was the suggested stamp for the project. I used a dauber to first ink it then dabbed it into the jar of PP and just kept dabbing and rubbing onto the card and once I removed the stencil I tried to smudge the edges so the wouldn't be quite so perfect. 

Then I just stamped some forest trees (basically copying a card from stampscapes), the grass in the front and my sentiment which I heat embossed in black then added a few dew drops. All in all I am quite pleased with the look.

I am making a trip back to Calif to visit my daughter (yeah she was just here for a week) to go through the Vasona Park Tree lights..its normally a drive thru event but the first Sat in December they allow you to walk through and imo it's way better to walk it then it is to drive thru. There's a bunch of food trucks and music. I didn't want to miss the chance to enjoy some Christmas festivities with the grandkids. 

When I return I have a long list of stuff I need to get done but I do hope to step back into some card making because I enjoyed it and realized how much I missed it. 


Saturday, November 20, 2021

Christmag Tags

Well I've been a bit busy trying to get the house tidy, grocery shopping, etc for my dd visit. I am excited her family will be here for a week. 

Of course that means keeping my grandkids busy since we don't exactly live in suburbia. I bought a few things for them to keep them entertained and they love to help decorate for Christmas so that's another full day activity. 

In addition I thought they would enjoy decorating Gingerbread houses, now I know I could go spend a few dollars and buy them a kit but to be honest I have a loving memory with my son where we went to the Palace Hotel in San Francisco and decorated these huge houses and more impressing is that I had my very own which I did not expect. I wanted to share that experience for the grandboys. Further I plan to take them to WinCo which you know has barrels of candy for them to select out there own decorating supplies. I'm pretty sure that will go over well. 

Here is a snap shot on the pre-houses..I was starting to get  a bit carried away with decorating and had to stop and realize that landscaping is more of a decorating aspect so I stopped. (and there is a peek at my laundry room counters with paint color choice..I felt this was the safest place till they arrived.) There is a window on the side that I cut out, but I couldn't decide if cut out or drawn on was better so I left it at the one. 


And in between the houses I was making some Christmas tags, I really have been wanting to do this for the past 5 or 6 years so this IS the year I finally did it. 

I like to watercolor so that's what I did for this batch (I may make some others) and did an assortment. I also used my foil machine for the wording which I feel really adds a bit of elegance to them. 

I still have a few more strings to add but it's a good start in the meantime. 


Tuesday, November 16, 2021

Just add snow

I admit it, I am cheating a little bit on this homework assignment. The task is to add snow to your project and they offered a few ways none of which I had so instead of doing another snow stencil with paste I am opting for something I have had in my stash for a few years. Yeah that's me buy it, set it aside but never use it until one day you realize you can and will use your supplies. 

What I made are ornament tags, they are from Papertrey Ink the kit was released in 2014 ( yeah I know) and I am sure are not available on their website anymore but they do re release archived stuff so you never know. 

Honestly when I first bought the kit I was like why are the stamps and tags so big and what am I supposed to do with these plastic orbs, I'm never gonna use those..lol funny how we can be some narrow minded and limited. I am here to say holy cow! why didn't I ever use these before they are so darn adorable and after watching a couple of videos I have a very clear idea how I am supposed to use all those dies and stamps where before I was a bit intimidated not knowing how to use them. 

And these were actually very simple to make. So here is the first step of die cutting the scenes, I then stamped over the deer, snowman and trees after coloring them with copics. Also tried to give the little cabin some dimension and just for fun a little glitter glue to make it a bit more festive. So everything you see is part of the Tinsel and Tags kit. 

Here is the scene before I add the snow and globe. 


And the finished globes. I plan to use these on a couple of gifts for friends


So I have four more globes left than I'm not sure if the globes are still sold, my guess is probably not and haven't searched Amazon to see if there's anything like these through them. Until then I guess I'll just have to be selective when gifting the rest. 


Monday, November 15, 2021

Storybook Coloring

Back to homework. I really loved this challenge because honestly I was highly impressed with not only the artists skills but the probability that I could actually do this. 

It's all about Storybook coloring with markers (Copics for me) and I had never even thought about this at all. Apparently it's usually done with watercolors but with markers I believe you can achieve the same results. 

There are two things that really impressed me, the first No Blending. That's right just straight out simple coloring going from light to dark. You do an all over color of light maybe leaving a few pecks of white..and just color willy nilly not getting it exact. Then you pick your shadows go with a wide area of mid tone and then finally the dark color to emphasis the deep shadows, that's it your done. I highly recommend you try this it's really very easy. 

Second when you stamp your image a lot of times we like that crisp black and then we color, this time one stamp, color, repeat stamp..of course you would need a stamping tool to get your images to align but hallelujah I am blown away by the end result of doing that. Hard to capture with my lens but trust me is really looks sharp and clean with the second stamp after the coloring. 

Here was my take on this homework assignment. 


Sunday, November 14, 2021

Another Non Homework Card

I was really wanting to make this card with foil but I just didn't have the right size sentiment in order to make it work. I did heat emboss the holly branches (messily I might add) and then in lieu of shiny foil I did find a bit of red foil cardstock in my scrap pile so I used that which I think turned out quite nice. I also choose to heat emboss my holly berries but I only had one type of red embossing powder and it happened to be glitter based..oy glitter in embossing powder oh the mess it makes. 

Funny I have been re-reading Ali Edwards book, Life Artist and ironically I'm on a page about excepting imperfections and not to be a perfectionist, which I might add is difficult to do. I don't worry about what others think but it's me I try to please and for that it does become frustrating. At times I wonder if any of the great artists like Picasso, Rembrandt or Monet or any other famous painter have self judgement or did they just paint and say here like it or leave it. I'm not saying I'm even a drop like those great painters but it's just a reflection of wonderment about how life effected them. 

Any ways here is my messy imperfect card. 


Saturday, November 13, 2021

Not Homework

 
I admit it digging out all my supplies has been a motivator for me, so after playing around with my hot foil I really wanted to make another card that wasn't focused on my homework for the online class but utilizing some techniques they had be achieve. 

I had visions of bright pink but not gonna lie the Heidi Swapp foil just isn't that great, especially for an amateur like me. After much research I found out not all foil is created equal and times and temperatures vary among each foil type so after three or four attempts with the hot pink I gave up. I went back to the trusty red from Gemini which I have 0 problems with  as you can see for yourself, in the end I actually think this was a better choice. 

I also was motivated by some cards from Shutterfly that I thought I could easily replicate so that's what led me to this attempt. I am quite pleased with how it turned out. I'm not one to replicate my Christmas cards but honestly I like this one so much I could easily mass produce it.  

Stamps and inks were all from Tim Holtz. 


Friday, November 12, 2021

Stencil Resist

Well for homework on this card I was supposed to take a stencil use some paste with it, let it dry then watercolor over it, this the paste in theory would somewhat resist the watercolor. I say in theory because I'm gonna call this a fail. The paste absorbed the watercolor and I had to go back with a white pen and color in my dots of snow. 

This is simple enough and in the demonstration they used water based inks which I also tried but I had stampin up and they did not blend out nearly enough so that too failed. In the end I kept the water colored one using traditional watercolor paints. 

I believe as of today I am at least two classes behind so getting caught up. 


Thursday, November 11, 2021

Alcohol Ink Envelopes

Well this is one area I couldn't complete, I had a Yupo which works great with alcohol inks I just didn't have a 12x12 sheet to make an envelope. In hindsight since I made an envelope I could have used an 8.5 x 11 sheet which I did see at Michaels and could have bought it but at the time I thought I needed 12x12..oh well.

Since I couldn't make the alcohol ink envelope I opted to do it in watercolor and go ahead and make a card using the alcohol inks on the Yupo instead. 

Again I didn't have much in the way of templates and used one from Tim Holtz that had what I thought looked like Poinsettias so I went with it. 

Basically you wet you Yupo paper with alcohol blending solution and then drop you alcohol inks on top..then you use a straw if you are cheap like me (or a hand held air blower which run about $18) and blow the inks around and adding a lot more ink and blending solution until you get what you think looks good..it take awhile and honestly it's all up to you when you decide it's done.  

I won't like this can be a messy project so be sure and protect your desk or whatever your are creating on. After you get the background color done you use a stencil and more alcohol blending solution lightly soaked onto a ink foam pad and either blot are swipe which causes the ink to lift and you are left with your stenciled image. Kind of cool but honestly for me this was a lot of work. 

So here you go a card and coordinating envelope. 


Wednesday, November 10, 2021

Hot Foil Press

Well Hallelujah, finally something I own including the dies for todays homework. I can't believe how lucky that turned out. 

I wanted a hot foil press last Christmas which Santa brought me but I had a move plus unpacking a boat load of landscaping that had to be done, summer visitors and there just wasn't much time to play so this is actually the second time I've used it. A welcome challenge for sure.

Day 9's assignment was to use hot foil press and your copics which you can color after hot foil impression. Basically the foil resists the inks much like heat embossing. 

So still running behind I'm hoping to get some more free time tomorrow to get a couple of cards done. 


Tuesday, November 9, 2021

Blended Backgrounds

I admit it I am running behind by at least 3 classes. Yesterday I had to strike while the sun was shinning and plant 375 bulbs (a mix of tulips and hyacinth) and today I had to devote to cleaning. So fun time just had to wait. 

But alas here I am with class 7 I think. In this class homework involved inking up a stamped and embossed image while leaving one area uninked. Now I am not going to lie it took me I think 5 or 6 card panels before I was successful in getting this card panel completed. After card 3 I inked up the background but completely forgot to mask off the diecut. That was kind of the whole idea to ink up all but a portion of the card where you overlayed your die leaving it lighter as you inked closer to the masked area. My failed attempts were mostly from failing to have the right embossing powder and failing to heat emboss the entire image therefore when I inked up the card I rubbed off the embossing powder, talk about your frustrations.

As you can see I prevailed in the end. 


Monday, November 8, 2021

Stepped up Stencils

 For today's homework we were shown how to rethink using your stencils and I loved the project we were shown which did an ombre look down the stencil and using a piece of paper they were able to also provide a 2 tone look. Super excited I was ready to give this a try. 

However, you know when you are so inspired by a card that someone made you want to make it and as you raid your supplies you quickly realize that the products they used you do not own anything that would work. This usually requires a shopping spree for me but since I have now ordered from 3 different stores I think I really need to use what I have which sadly when it comes to Holiday stencils I am sorely lacking.

There was a part of me that knew I could use my Shilouette to make one or if you use the negative space from your dies that can be another makeshift stencil, but I really wanted to make something now. 

The nice thing about this whole Covid shutdown is learning on how to still meet up with your friends and since I was zooming with my bff she helped me pick out a stencil she thought looked like a candy cane so I went with it. 

I did my best to do an ombre effect and sadly ripped my stencil in the process so you'll see some coloring outside the lines that is. 

And my take on the ombre look minus the two tone colors


Sunday, November 7, 2021

Embossed Cards x2

 Todays homework assignment was a lot of fun. I don't think I have been this excited to used my embossing folders before. This was day 5 and they did demonstrate using a gel block which I do not own and probably won't buy so for the first card I simply inked my deep embossing folder from Gemini. I think it actually worked fairly well and I was so excited by the folder that I actually tried foil, it worked but it wasn't enough foil on this particular image so into the trash it went. 

I used by Papertry Ink dies and stamps for the foilage, SSS for the sentiment and added so stickles for a bit of sparkle. Definitely a different kind of Christmas card. 


For the next card I pretty much followed the demonstration and grabbed some foil card to emboss and gotta say I love it. So hard to catch the glimmer in a picture. But I really loved how this turned out. 

This reminds me of some old KI Memories Holiday paper that I just loved. So I've completed my homework for day 5 and now onto day 6. 


Saturday, November 6, 2021

Wow, another card done

I am amazed I was actually able to accomplish yet another card. This is the most I've done in a year.

Today's homework was for class 3. Infinity shaker cards which I've never heard of before, let alone made one. 

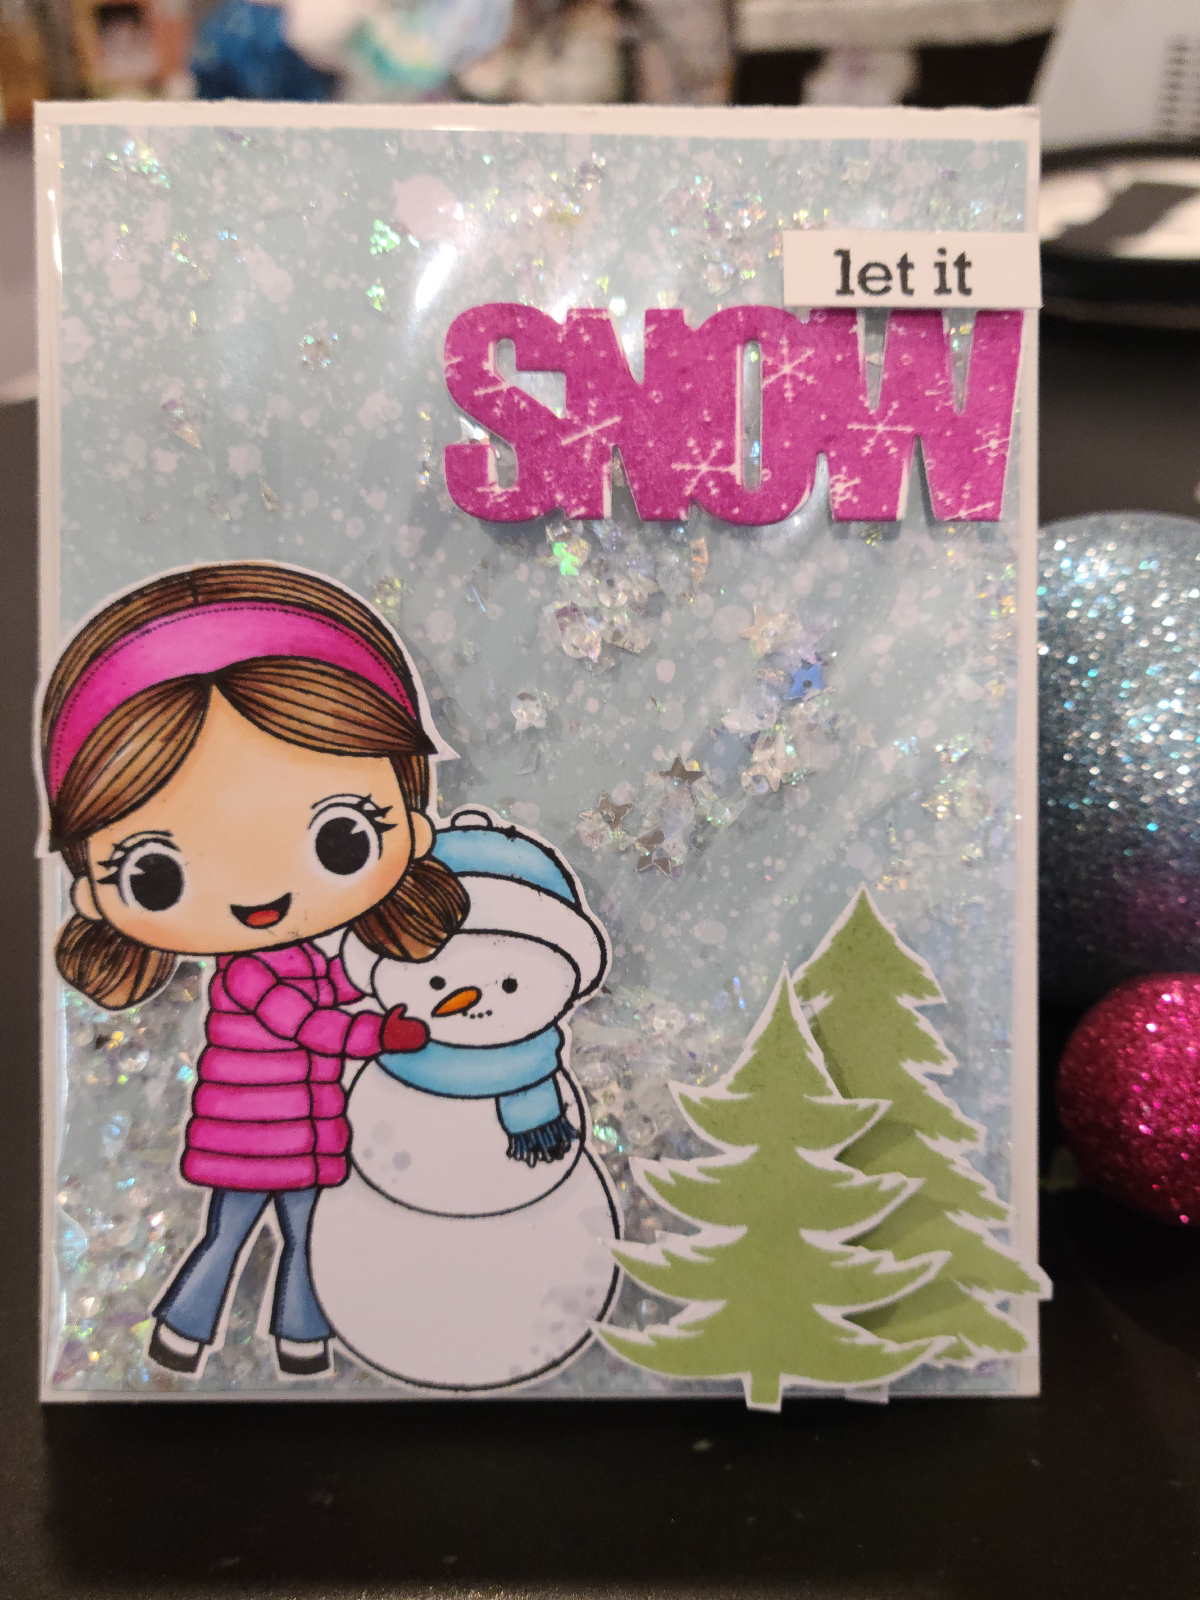
Basically you take the packaging film that most stamps come in, trim it down so it's about a half inch larger than your card panel, then slice it open along 1 of the seams then you wrap your panel with it and afix it to the back side of the panel using double stick tape,  leaving one end open to fill the card before you fill it.

I won't lie it is a pretty easy and fast way to make a shaker card, but for me I felt it looked very similar if you'd wrapped your couch in plastic. It just seems like I'd wrapped my card in plastic. I think I would prefer a frame around the project but I'm sure there's a fan base for these and honestly I can see why. I really enjoyed learning and trying something different.


Friday, November 5, 2021

Holy Crap it's a Card!

 Yes that's right ladies and gentlemen, I made a card. How long has it been, 3 moves, 2 fires and a new house. I've finally settled in and am on the crusty edge of creating again. 

Motivated by a Holiday card class, I signed up and have since watched my first video which was Monday..and I'm just getting a card done. I can't tell you how alien this is seeming to be, finding supplies figuring out stuff..it's almost all new but luckily not that new. 

Any hoo this is Day 2's homework assignment. It was a lesson on mass producing card. Intriguing idea of using a stamp background image then ink in the color. For this card I used a HoHo sentiment from MFTS and used their red ink to tone down my white card panel. I am learning you can use colored card stock to safe yourself some time but you know what I don't have a lot of colored cardstock so am limited. I also did as the class demonstrated and dipped the edge in embossing powder after using versamark to give a white outline to the card panel. 

Once I had my stamped and colored card stock panel I used pattern paper also from MFTS because I didn't have much in the way of a stencil as the class illustrated, especially holiday themed. I then mounted everything on to a card base and did a triple mat of the Joy from Hero Arts and added in some sequins. 

Whew can't believe this took two days to complete. I am so behind.