
Wednesday, February 27, 2013
Use that stamp
I don't know if your like me or not but I have so many stamps and products that I sometimes find myself feeling guilty that I even bought them. So today's post is about using those products that I bought but never really used. This was a Hero Arts stamp that I fell in love with, I had many plans for this stamp. Oh the fun and pretty things we would make together, but alas it was placed in a drawer and long forgotten about. So today it gets to be front and center. Using up some old Cosmo Cricket pp, I made a pretty little Thank you card as one can simply not have enough of these on hand.

Monday, February 25, 2013
Harry Potter Tees
I really wanted to try out my new Cameo to make some tees for the grand babies and my dd had wanted t-shirts for her two boys with sayings from Harry Potter. So putting her idea to paper or shirt rather I was able to create the following shirts. The hardest part was finding the right font. This one happened to be in the Silhouette store so I didn't have to look too hard.
I made the shirts opposite in color because it perfectly reflects how the boys are complete opposites. The oldest boy who is just a little over 2 and is very rambunctious, completely fits the "I solemnly swear I am up to no good" saying because that is him in a nut shell. The other boy is 7 months and being the complete opposite (laid back) it was obvious he would wear "Mischief Managed."
I have to say the Cameo makes making these heat transfer vinyl shirts a breeze. If you haven't done one yet and own a Cameo I truly encourage you to try it.

Friday, February 22, 2013
Fast and Easy
So decided to make a quick little card for today's post. I loved the simplicity of this little tree stamp from Papertry Ink..and I really love that they have dies that coordinate with their stamps. All the stamps are from the same set for about $5.
To make the broken arrow I simply cut a strip of pp, flipped it over and drew a line down the middle with a ruler ..marked off distances on both sides then drew lines from those distance tick marks to the middle and cut out..probably not the best or easiest way but that is what my brain came up with after a 9 hour shift at work.
Enjoy!

Wednesday, February 20, 2013
Mother's Day Card
I am trying to be a little more organized this year. I actually filled out and have ready to mail all my birthday cards through May and keeping with that theme I went ahead and made my Mother's Day card.
So using up some older Basic Grey product (another goal of mine, to using up older products) and using some new Stampin Up markers and a stamp/die combo (For You) along with a Stamp I had tucked away, I added a few K&Co floral embellies and this is the card I came up with.

So using up some older Basic Grey product (another goal of mine, to using up older products) and using some new Stampin Up markers and a stamp/die combo (For You) along with a Stamp I had tucked away, I added a few K&Co floral embellies and this is the card I came up with.

Monday, February 18, 2013
Zoltar predicts
So the other day my poor grandson was hunched down and being the terrible grandmother that I am I couldn't help but snap a photo of his little "butt cleavage" and of course knew I would have to scrap this..and I am sure one day he'll hate me for it, but in the meantime here is what I came up with.


Thursday, February 14, 2013
Happy {love} Day!
So in honor of Valentine's Day my co-workers are being rewarded with these fiery little cupcakes. The recipe is from Cupcake Wars (foodnetwork.com) but I did adjust it sparingly. They have a nice little bit of heat and a subtle cinnamon flavor. Definitely yummy!
In my version I cut the cayenne pepper in half, cheated and used 2 T King Arthur's Red Velvet cake flavoring instead of the red food coloring, omitted the cinnamon from the frosting (didn't want a funky color which the cinnamon will do) and used about 2-3 T Cinnamon Schnapps. ( I would say add 1T and taste from there until you are satisified with the flavoring, mine were mild but you could ramp them up if you like it super hot!)
Red Hot Velvet Cupcakes

Wednesday, February 13, 2013
Back to our regularly scheduled program
So now that I am through birthday parties, Valentines Day and the Holidays in general how about so normalcy for a bit. Thought I would share a layout I did with my early birthday present; a Cameo Silhouette. I cut out the Main title (Data Plan) and loved how crisp and clean it cuts. Definitely looking forward to all my future projects to use my new tool with.
Any hoo I was cleaning up my crafty room after the creative whirlwind hit it and of course needed to setup my Cameo and stumbled across these photos I printed out in December. I had purchased a new phone and realized that my phones were getting larger and thinner as time went on. So figured it deserved a layout and I found an image of what the first cell phones looked like (and believe it or not my mom had one so I remember exactly how big this thing was) and used it for an ironic comparison.

Any hoo I was cleaning up my crafty room after the creative whirlwind hit it and of course needed to setup my Cameo and stumbled across these photos I printed out in December. I had purchased a new phone and realized that my phones were getting larger and thinner as time went on. So figured it deserved a layout and I found an image of what the first cell phones looked like (and believe it or not my mom had one so I remember exactly how big this thing was) and used it for an ironic comparison.

Monday, February 11, 2013
Party Day
Here are the photos with the last bit of items that got tended to the day of the party. All in all I would say it went off without a hitch and yep I did make 2 cakes (Carrot and Banana). Also made a flat bread pizza, potato salad, Asian salad and just a meat and cheese platter with some mini Hawaiian rolls. Made a tangerine-lemonade punch with some ginger ale and a few scoops of sugar to sweeten it up a bit. Appetizers were a 7 layer bean dip, stuffed mushrooms and a veggie platter.
Only thing I can say in hindsight is my dd made the balloon wreath and I didn't know how big to make the circle banner inside..should have done a 5 or 6 inch..but alas no turning back.
So here are the T-Rex prints..they went all the way down the walk way, the driveway and out to the sidewalk..I think I cut about 30 footprints and used them all.

Here is the banner with some ivy which hangs just underneath the porch line as you walk up

Here is the Balloon Wreath that my dd did...a lot of work went into this. Each balloon is stuck into a straw wreath with T pins. A really cool idea and look

So here is the table. I have it with 2 leaves so it was quite long


Now in all fairness, I don't want you to think I went out and spent $$$$ on all these decorations. I was fortunate to have an abundant supply of dinosaurs from my oldest dgs dino phase. And the plastic trees were from a Army vs Dino ensemble I bought for him ~10 years ago. My oldest ds purchased the cut outs and I had the rocks from my amble garden stash..so I didn't really spend anything other than the 2 of the vases and the plastic plants which I think helped to give it a jungle feel.


Friday, February 8, 2013
A few more party details
So continuing towards the big day on Saturday, I have added a few more items to the party decor. I will also post after the fact so you can see the final details which won't be in place until party day.
So first up is a sign I did welcoming guests as they arrive. Basically I printed out the text, stamped some dinosaur tracks and added a few leaf die cuts and put the whole thing in a frame, set it up on an easel and placed in on my entry way table. I added a few plants and a giant T-Rex (from my oldest dgs stash of toys from when he was a wee lad) to complete the greeting.


To give the utensils a bit of flair I decided to wrap them in some heavy duty twine that I had stashed in my closet and the funniest thing, I found a small jar of embossing powder that had fallen into the center so it was like finding a small gift.

And I will show this cake banner when I finally get it set into the cake but wanted to show you for now what it looks like.

My dd is making a balloon wreath and I have small embellished scalloped circle to hang in the center of it so should have that posted after the party as well in addition to the overall table display, cakes, T-Rex footprints leading to the door from the street and a banner that I plan to hang outside and embellish with some ivy. I am hoping to find a ~4ft inflatable T-Rex to stick in the bushes that align my walkway to the porch. Overall I think this is coming together fairly nicely.
Wednesday, February 6, 2013
Party Favor
Well normally I would do something a little different for a group of kids but 99.9 percent of everyone coming is an adult so I created something besides food that I thought might be a nice gift to give out.
Refrigerator magnets. These are super super super easy to make and for less than $5 you have a very nice memento.
I like to make these at Christmas time because as I say they are easy to make and don't cost a huge amount of money. And they are very personable. Normally I would use Doodlebugs Tiny Alphabet rubons but I didn't have enought so just used Die Version Micro Mini dies to cut letters (and yes this was painstankingly to do so I don't advise it..I know I'll never do it again for as many as I needed to make. 1 or 2 would have been fine). I imagine you could also stamp some Staz-On instead but as I said the rubons are by far my favorite method.

Monday, February 4, 2013
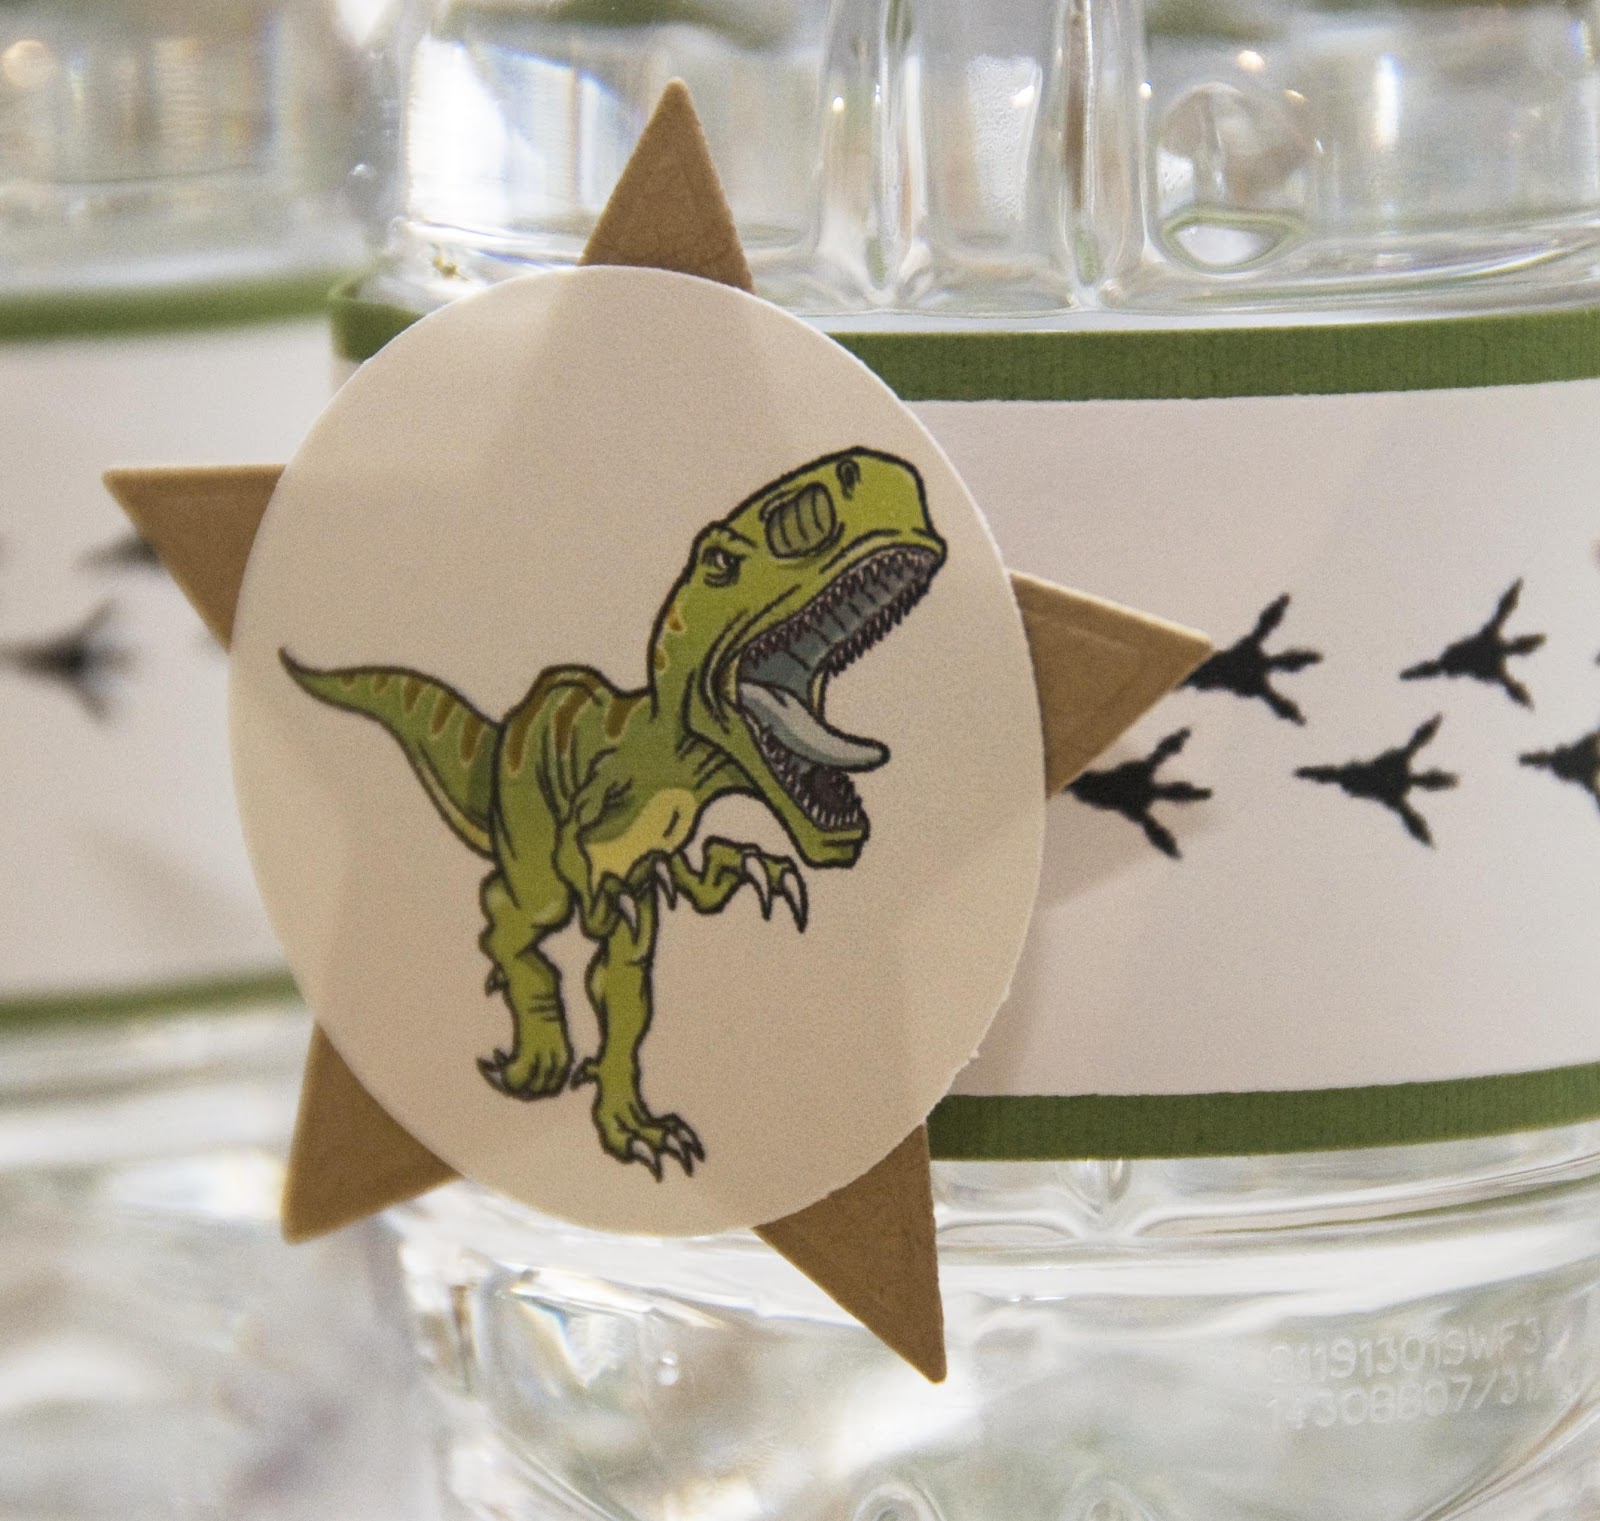
Party - Bottle Labels
Getting ready for my grandson's birthday party and one of the things I made were bottle labels.
I have to say I have never really thought of doing these but since my dd mentioned them I figured what the heck. If you aren't as anal as I am you don't have to do the matting but just adhere the paper (I used some cheap cardstock so it would pick up the print better than normal printing paper) to the bottle. In fact I will be hosting my own 50 and Fabulous birthday party at the end of April with about 3 times as many people and I am already thinking this would be too much work. I just made 20 for my gs bd.
I think just a nice outline would be suffice and I already ordered the Cameo as an early birthday gift and hope there is a label shape more than just a rectangle that I can just print and cut.
So if you have never made these before they were easy enough. 8-1/2 x 11 paper is the perfect size as the width of the paper is the exact width you need for the bottle. Also the label width is at about 1.25 so you can easily get 6 strips or labels from each piece of paper.
I would suggest hot gluing the ends together so you don't have to worry about them coming apart and a little bit of adhesive in the middle to hold the lable to the bottle. It is just easier to tack them in place, wrap and glue together.

So as you can see his party is a themed for Dinosaurs.

And here is just a brief look at part of the table setup. I will post more as I finish the table. And yes I need to setup now because working full time, plus swimming at night three times a week doesn't leave me a whole lot of relaxed free time where I can make sure everything looks good...yes I am too darn picky and sadly I am aware of it.

I have to say I have never really thought of doing these but since my dd mentioned them I figured what the heck. If you aren't as anal as I am you don't have to do the matting but just adhere the paper (I used some cheap cardstock so it would pick up the print better than normal printing paper) to the bottle. In fact I will be hosting my own 50 and Fabulous birthday party at the end of April with about 3 times as many people and I am already thinking this would be too much work. I just made 20 for my gs bd.
I think just a nice outline would be suffice and I already ordered the Cameo as an early birthday gift and hope there is a label shape more than just a rectangle that I can just print and cut.
So if you have never made these before they were easy enough. 8-1/2 x 11 paper is the perfect size as the width of the paper is the exact width you need for the bottle. Also the label width is at about 1.25 so you can easily get 6 strips or labels from each piece of paper.
I would suggest hot gluing the ends together so you don't have to worry about them coming apart and a little bit of adhesive in the middle to hold the lable to the bottle. It is just easier to tack them in place, wrap and glue together.

So as you can see his party is a themed for Dinosaurs.
And here is just a brief look at part of the table setup. I will post more as I finish the table. And yes I need to setup now because working full time, plus swimming at night three times a week doesn't leave me a whole lot of relaxed free time where I can make sure everything looks good...yes I am too darn picky and sadly I am aware of it.

Friday, February 1, 2013
Travelling Back In Time
I am working on some birthday items for my grandson's 2nd birthday party that I am hosting at my house next week and haven't had much time to update the blog with new stuff so forgive me for a moment as we travel back in time to a contest, yes a contest. Making Memories Idol Contest to be exact. Not sure if they even still do those. Any hoo I found this layout I did that got me to the next round (I made it to the 2nd to last round which for me was thrilling in itself).
We had to do a layout about us and this is what i came up with. I am still drawn to the contrast of the black and white punched with a shot of green. And I thought I would share this because the journalling also describes me somewhat. While of course I am going to be celebrating my 50th in a few months and have 3 grandsons instead of 1 alot of it still holds true.
Let me know what you think.


Subscribe to:
Posts (Atom)