Search This Blog

Monday, December 26, 2016

Holiday Hello

Here is another scrap card. I had stamped the background for something and it didn't work out but I hated to see it go to waste, my challenge was to make a card with it. The Santa I stamped and water colored 85% of it over the summer so it needed to be finished. I then meshed the two together and used a sentiment embellishment that I had stamped for some altered gift tubs.

I must say it does make it easy when all you have to do is assemble things already done for you.


Wednesday, December 21, 2016

Continuing on..

With my leftovers from my room cleanup I had this altered or distressed panel that I created from my class with Tim Holtz. I used his resist paper and inks to create the look. I matted and it and mounted it my card panel.

Then I stamped some leaves and berries with Papertrey Inks stamps but soon realized I didn't want to fussy cut those all out so I ordered the matching dies. Those came and this obviously just sat until now. Finally it's completed. The Joy sentiment and stamp are also from Papertrey Ink. The Joy was a leftover die on my pile of scraps so a double score for me.


Monday, December 19, 2016

Hello

I was finally at a point with all the flurry that December brings to have a moment of time, time I used to clean up my desperately cluttered room. Now that I finally wrapped presents I freed up valuable floor space and it gave me the desire to get my room in order.

As usual once I start cleaning I inevitably find a pile of scraps and odds and ends on my desk. This was no different, quite a few of projects I started that needed to be finished. I separated those items into scraps, left over die cuts and panels that could be made into cards.

This card falls into the latter. Although it is my challenge that I also use up those scraps of paper left over from other cards and was able to do so with this card as well.

This panel was stamped and embossed from sometime in the summer. I water colored it a few months back so it just needed to be finished. The purple strip of pp was also leftover in my pile of stuff so I was eager to use that up. The green pp was old old old basic grey so was happy to have used that as well. I die cut from MFTS the Hello and added a few enamel dots. Done and Done.

Wednesday, December 14, 2016

Joy

I was watching TV and a holiday greeting commercial from our local station inspired me to create this card. I saw a gold and red chevron pattern they used and was really drawn to both the colors and pattern.

My chevron was cut using a die from Papertrey Ink out of gold paper I purchased from Michaels and then I matted that on top of silver glitter paper I purchased from Joann's. It is a little hard to see in the photograph. The snowflake was from Simon Says Stamp. the holly and berry stamps and dies are from Papertrey Ink and the Deer and Joy dies are from WPlus9.

Monday, December 12, 2016

Christmas Cheer

Well my fellow bloggers it was late when I created this card. We had gone to my husband's annual Christmas Party which is always fun and when we got home it was early afternoon, but alas we found out from my youngest son that our TV died.

Now granted this TV is only 10 years old but the cost just to call a repairman was $100 and it seemed silly to pay that when a new TV is so cheap these days. Well off to Best Buy to purchase a new TV and by the time everything is hooked up you realize that your surround sound system is equally outdated and can't connect to your new TV, thus another new equipment purchase to update that system which was easily 20 years old. I didn't feel too bad about the later, I knew it was due for an upgrade. But Christmas definitely came early to our house. Good thing there our lots of great deals to be had.

Sorry I didn't mean to be so long winded but it was pretty late by the time I was able to whip out this card and light sources are hard to come by. I finally found some half way decent light.  The Christmas die is from Penny Black, the Birch dies are from MFTS, the outside panel and hill die are from Simon Says Stamp and the deer was from Poppystamps.


And as an added treat here is a picture of a caricature portrait we had done at my hubby's party.

Wednesday, December 7, 2016

For the first time

in a very long time I find myself with zero Christmas cards. Not because I didn't make them but because I sold them. I am trying to make a bunch for friends but for some reason everyone wants to get together early this year and I don't feel I am going to be able to make enough cards. Alas what am I to do?

Now I am contemplating using this picture I took recently of my kitty to order some cards from Shutterfly but still on the fence. I don't know if that's just me being against having someone else make my cards or I just believe I should make my own.

What do you think, send or not to send.


Monday, December 5, 2016

Christmas Time In The City

I originally masked a card panel off and used distressed inks to create the background, but who says paper tape doesn't stick. As I was pulling that last piece off...rrrrriiiiippp there went my card panel. Ugh. No worries I just cut out the part I can use and matted it on some pp. Problem solved but errr, who likes to encounter problems when they're trying to make the perfect card.

Stamps are from Papertrey Ink and the die is My Favorite Things stamps.

Wednesday, November 30, 2016

Christmas Wishes

While I had my watercolors out I felt the need to use the blue for some reason and wondered how the Yeti stamp set from My Favorite Things Stamps would work. I also used some stitched hill dies from Simon Says Stamp and their fallen snow stencil along with some glitter paste. The Christmas die is from Clearly Besotted stamps and the pattern paper from MFTS. 
 

Monday, November 28, 2016

Watercolor - Wishing You A Happy Birthday

Thought I would take a break from my Christmas cards which have been selling quite well at my local craft fair and watercolor a bit.

I mixed both the Peony and Beautiful Bouquet sets from Altenew for this card. Used my Simon Says Stamp Wishing die along with a birthday stamp set and added a couple of enamel dots.

Wednesday, November 23, 2016

Feliz Navidad

After my hiccup last week trying to make my cacti card I decided I still need to whip something up with cacti because it was one of those challenges I placed upon myself not to let my mishap deter me.

Not quite what I had envisioned last week but I think it gets the feeling across none the less. The festive light die is from Poppystamps or Memory Box and the Cacti stamps are from MFT stamps and the sentiment was from Simon Says Stamp. The images were colored with copics.

Monday, November 21, 2016

Merry and Bright

It's been raining here all weekend and what better time to spend in doors than with some scrappy time. I had die cut this glittered deer a while back and thought it would be a shame to let him go to waste so gathering up some old products I was able to create this card.

The deer and Merry die cut are from WPlus9, the tag set is from Papertry Ink as well as the & Bright stamp. The 3 Snowflakes are from Simon Says Stamp which were cut from a white glitter cardstock which apparently is lost with photography.


Wednesday, November 16, 2016

Ho Ho Ho

So I missed Monday's blog post but I was frantically finishing uploading products to my second shop, Sweet Kaboodle. If you are interested you can find it here. If you are interested in any of my cards I am selling them in my new shop along with soaps and a few bath products.

I had started this card that I hoped to have ready for my Monday post but alas I ran out of time. I have to say this card went in a whole other direction that what I had envisioned. In fact it looks nothing like it. I wanted to stamp some cacti then have these lights wrap around them but it seemed a bit impossible so I gave up and after stamping all the lights red I went in a different direction. I love this shiny silver cardstock and can't seem to find anymore of it so I use every bit of it I have, no wasting this stuff. It worked perfectly here along with the fun black and white striped pp.


Wednesday, November 9, 2016

Holiday Cheer

After playing with my sparkly Believe card I wanted to continue the sparkle with a fun shaker card. Having some fake snow and blue themed sequins I decided a Yeti would make a perfect scene for the card.

Using some MFT stamp birthday pattern paper and stamp sentiments from Papertrey Ink I was able to put this cute card together. .

Monday, November 7, 2016

Another Believe

As I was driving my mother to the airport I kept thinking about Christmas cards and of course the Believe die that I had just used last week and my thoughts led me to thinking about some glitter and magic with the word believe. So when I got home I put those thoughts into actions and embellished the Believe die with some sequins after punching it out from some glitter cardstock.

I tried a few different backgrounds but ultimately was drawn to the black and white striped paper which was actually from a Halloween pad. This is a simple enough card to make and you probably notice the word Believe was popped up to add a bit more dimension to the overall look and feel of the card. I do like the look for the rounded corners which helps give this card a little more character.

Wednesday, November 2, 2016

Believe

I recently purchased this believe die from Simon Says Stamp and gotta say it needed to be used immediately. I love that it also comes with a shadow die and of course I purchased the stamp set as well.

For this card I paired it with some Lawn Fawn Christmas stamps/dies as well as MFT pp. Finished it off with a few sequin. And not sure if you can see it but I stamped stars for the illusion of magic in both a gold and platinum color. I liked the double colors.

Monday, October 31, 2016

Watercolor - Merry Christmas

I was missing some watercolor time so I cleaned my craft room and set right into some water coloring. I keep waiting for Altenew to release some Poinsettia type stamps for Christmas but alas no such luck. Well being I was in the mood for a bit of Poinsettias I would have to make my own, thus this is my take on them. Although they aren't as red as I would have liked, I definitely think it still reflects enough of those Christmas colors to be called a Christmas card.

Wednesday, October 26, 2016

Joy

I have noticed that I have one card which has gone world wide and has over 4500 views. This was a card I made two years ago and to this day it's still getting pinned a lot. This inspired me to attempt another deer card as that was the focus of the card I made at that time.

And in case you are interested, the card can be found HERE

So using my WPlus9 Deer dies I was inspired to make this card.

Monday, October 24, 2016

Peace on Earth

Well my fellow blog readers I received a delightful email over the weekend. Appears that Scrapbook.com is featuring one of my cards in their Top 10 Holiday Cards article. I am both delighted and ecstatic that someone loved my card enough to feature it. If you want to read more about their article you can find it HERE

I have been playing with some warm and cozy flannel and it inspired me to make this card. The greys and reds against the white really spoke to me so I replicated it.

The Peace die and sentiment stamps is from Papertrey Ink. the little house and tree die is from Memory Box and the fallen snow stencil is from My Favorite Things stamps.


Wednesday, October 19, 2016

Holiday Cheer

This was another set of stamps and dies I recently obtained from MFT. I was really torn between buying this set or not but in the end you can see I succumbed.

I truly think the birch tree die set was made to go with these cute deer. And I couldn't resist making one of the deer Rudolph.


Monday, October 17, 2016

Are you Yeti for Christmas

Well Readers I was a big flake last week and you {sniff..sniff} didn't have anything new to look at, and for that I am sorry but I will let you in on a little secret.

I have decided to open up a second etsy shop, and in addition to preparing for that I decided to join a craft fair which was a big step I wasn't quite ready for. This isn't a big fair just big enough to get my feet wet.

So I have been creating like crazy, had to order business cards since I didn't have any of those. Needed a way to display my clothes and an overall theme of some sort to display my table. I needed a card reader to take credit cards and a few other items.

Before I get onto today's card post (or just skip to the bottom) I will show you a few things for my second shop.

I am just testing the waters and am making a few bath products.

Up first are scrubs, for Christmas I decided to make Peppermint but will also have a Vanilla option

 
Also making Bath Melts
 

I also have 4 different molded soaps that are still on my to do list and will be giving away these bags with a purchase of 3


And speaking of bags I am busy sewing a lot of zipper bags for my shop and the fair. This is just the fist half . See that star bag, I love it because those stars glow in the dark. Such a cool fun fabric.


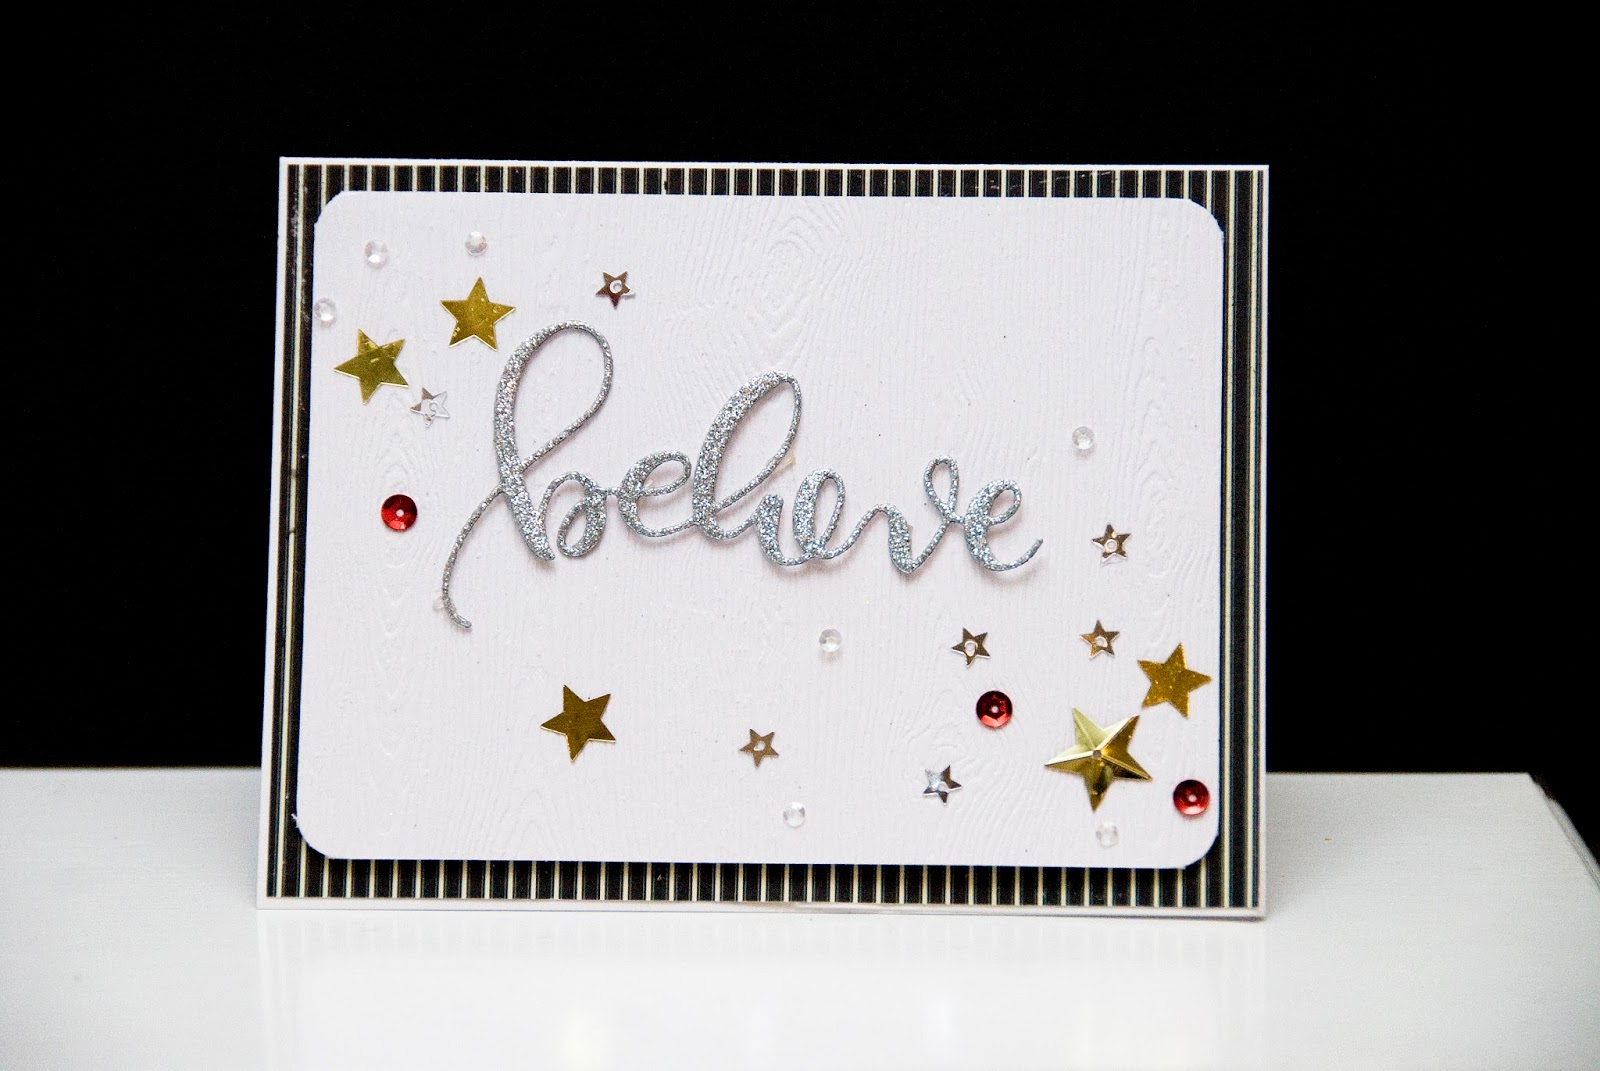
And now the Yeti card. I promised myself to stop sewing so I could work on a few cards and MFT goodies arrived and gave me just the inspiration I needed.


Wednesday, October 5, 2016

Boo from Me to you

Next on my neglected supply grab was this embossing folder and Kraftin Kimmie stamp. I figured I could pair the two together to make a Halloween card for my grandsons.

I used the sentiment stamp from Papertrey Ink and found a few tid bits in my stash to round out the card. I think the boys will enjoy this card. Just spooky enough without being too spooky.

Monday, October 3, 2016

Happy Haunting

It's been very busy around my house, specifically in my front yard. We have been on water rationing for awhile and must noticeably last year was pretty evident. Ever since last year we let our lawn go and this year after staring at some ugly landscaping we decided to plant drought tolerant plants to replace our lawn. That led us to replacing some very outdated rock that was on the exterior of the house, which then led to a new gate, and then after further review we decided to add a new walkway which led us to a new driveway which then led to repainting the house.

Be careful what you start because you just never know where it will take you. I am on the downhill part of the makeover. I just have to plant my 80 some odd plants and then it should be pretty much be completed.

Thus my crafting time has been delayed considerably but I did manage to make a few cards for this week.

I have pulled a bunch of stamps, dies and tools out that I want to give some love to. So first I decided to return to a bit of water coloring. This adorable witch is always inspiring to water color. In fact I don't think I have done anything but watercolor her.


Monday, September 26, 2016

Boo!

Ever since I used my Impression Obsession Halloween border die I knew I wanted to pair it with my Papertrey Ink Scene It dies for a Halloween card.

This is my result. I did struggle with adding some sort of sentiment and dug through my stash and found these great cardboard type stickers that I accumulated somewhere through my years. I think it worked perfectly.


Wednesday, September 21, 2016

No one elf

For my third My Favorite Things stamp contest I decided to go with a Christmas theme and used Birdie Brown's Christmas Elves which I opted to make a bit on the feminine side.

First up I created the background with the mini hexagon and ripe raspberry ink, corner rounded the ends and matted that onto my card base made with the ripe raspberry cardstock which was also corner rounded punched. I then die cut the stitched tag, stamped and colored my images. I did use the kirarina wink white marker to create the snow or furry texture on the hat and mittens and also used copic glitter pens to give a bit of a twinkle to the presents.

Finished the card by stamping my sentiment, popped up my elf, adhered the other diecuts down, then added a few enamel dots and some baker's twine.

Monday, September 19, 2016

Woofing You

Here is my second card entry for the My Favorite Thing Stamps Superstar card contest. Everything except the copics is from My Favorite Things. The gorgeous plaid paper that I am so in love with, the cardstock as well as the Lucky Dog stamp/die set, the stitched circle scallop die, the grass, trees and leaves.

I made my circle background by misting copics over a cloud die cut, then I stamped, colored and cutout the cute bulldog which was popped up with some foam. I also die cut the grass and trees from dies along with the leaves which are from the Autumn Harvest Mouse set and adhered them onto my background circle. The circle frame was added on top and after mounting everything to the base card I finished with a few enamel dots and a sentiment banner.

Best thing is that I now have a cute birthday card for one of my girlfriends.

Wednesday, September 14, 2016

City Skyline

My Favorite Things stamps is having a contest and if you haven't heard about it you might want to check out their blog. You have a chance to win a $250 voucher to their store and who doesn't love MFT products. You are limited to three cards and can only use their dies and stamps for obvious reasons.

I decided to throw my hat in so to speak. This is the first of my three cards. I used their NY city skyline that was backed and off centered on to a die cut of vellum. The back ground was created using distress inks then I splattered some water, pewter distress stain, added in a few white gel dots, star sequins and a couple of star crystals. I also framed the card panel with their scallop rectangle stitched die.

Wish me Luck and if you want to participate hurry up as contest ends September 22nd.

Monday, September 12, 2016

Happy Bird-Day!

As usual I found myself behind on my tasks and lo and behold I had a birthday lunch to go to and found myself completely unprepared. First thing to do was make a birthday card.

I had this flamingo set untouched for a few months and needed some inspiration quick to whip out a card and these stamps and dies did just that.

First I attempted to do a watercolor background with the distress crayons but eh not at all what I wanted, so plan b - use the distress inks, mush them on an acrylic block, mist with water lay a water color card on top and voila` instant background. Nice and vibrant just what I was going for.

I then cut the watercolor card using a MFT stitch rectangle die, stamped and colored my flamingos, popped them up using some foam tape, then mounted the layers on my base card. Lastly I added the  die cut grass also from MFT, the matte enamel dots and stamped my sentiment on a speech bubble which I also popped up.

Ok card done check, now all I need is a quick gift. Hopefully a pound of see's candy will do the trick.

Wednesday, September 7, 2016

Happy Halloween - Dog gone cute!

While I was feeling my mojo making cards for the grandkids I figured I better make something for Halloween since I don't want to be caught off guard when the time rolls around.

I spied my Simon Says Halloween stamps set and knew this would be perfect for them.

Again, I used my copic mister to spray black ink and then daubed on a little carved pumpkin from my distress ink collection.

The images were then stamped, colored and die cut. Also showcasing my Impression Obsession pumpkin dies.

Finished off the card with a few crystal stars and now I am ready for sending when the time arrives.

Monday, September 5, 2016

August Grandkids Card

Hope everyone is enjoying their labor day weekend and getting lots of crafty time in.

I am just a tad late with my usual monthly card to my grandkids and I am sure they won't notice too much.

I thought with summer over it would be nice to send them something for Fall and opted for these MTF stamps from Birdie Brown.

For the background I used my copic mister gun (which I hadn't used in ages) to spray some ink on the background then just stamped, colored and die cut the images.

Inside the card is says A Harvest Of Blessings.

Wednesday, August 31, 2016

More Halloween Inspired Cards

Ok I am still finishing up using backgrounds I made from the Tim Holtz products from the classes I took and honestly I am not even sure how this spider web background came out. It really was just a bunch of mistakes covering up mistakes.

I do know I loved what I started with which was a nice vibrant purple water colored card using his distress reinkers, then I tried to mist on some black distress spray using a spider web stencil which I hated so I took a wet towel and blotted off what I could which brought back some of the purple then I misted some perfect pearls on top of the stencil, then I gave up. It does have a nice sheen to it.

And one thing about spider webs that trouble me, the spiders never look realistic so I decided to give this a bit of three dimension and put a plastic spider on it. It's actually not too bulky as the spider is fairly flat.


Monday, August 29, 2016

Happy Halloween

Continuing with more of my Tim Holtz class byproducts I created the background using his paints as a stamp resist. Much like using any other ink or embossing technique this one simply uses paints to stamp an image with, then you ink up the card and wipe off with a wet paper towel to reveal the resist stamped image. I have to say I prefer these types of techniques by far than anything else I've tried.

Then using a plethora of die cuts I created my little scene. The pumpkins and broom are from Poppystamps, the tree from Quickutz or whoever they are these days. The Happy from My Favorite Things, a circle punch for the vellum then I used part of a Memory Box stamp to stamp just the Halloween sentiment. The plaid paper was part of that Authentique 6x6 Halloween pad I picked up at the expo.

BTW for a little tip, I use a piece of paper tape to cover up the sentiment part I don't want to stamp, ink up the stamp then pull off the tape. It's a pretty easy way to just use part of a mounted rubber stamp or any stamp where you don't want the entire sentiment or image for that matter.

Wednesday, August 24, 2016

Watercolor Halloween

So technically the background on this card is the water coloring, no image per se. This was another Tim Holtz technique. Using his reinkers on a pre wet water color piece of cardstock.

After you get your initial colors on the water color card you go back (once it's dry of course) and use his distress inks to layer on more color adding or intensifying some areas and adding in a color in other areas. I did have Halloween in mind when I made this background. I do like the vibrant colors his inkers lend.

The dies are from Impression Obsession and normally I would add a sentiment but somehow it just doesn't work here, it's just too distracting from the die cut image and watercolor contrast.

Monday, August 22, 2016

Watercolor Birthday

Well I don't know about you but I am struggling lately, struggling with time. I just don't seem to have enough of it to do all the things that I have on my plate. Of course I am the one who fills my plate I just keep adding to things I want to do and I guess I don't have to complete them all, but if I didn't that means things I want to get done won't. Sometimes I find it hard to keep focus but so far I am hanging in there.

My mother's birthday will be here before you know it and rather get caught off guard like I did with my grandson's birthday this past weekend I want to be a little more prepared. I do have her quilt done and I just wanted to make sure I had a card to go with it.

I decided to have the card match her gift and painted my new WPlus9 Mum stamp with some oranges and yellows. I love mums especially those spider ones..they are so cool.

Any hoo here is my card and now I am officially all set on the gift giving for my mom anyways.

Wednesday, August 17, 2016

Vintage - Halloween

Well I finally got a few minutes in my craft room and after unpacking and cleaning my room I did manage to come across a tag I had forgotten about. This was created during my Chemistry 101-103 classes.

I used a kraft tag and then used distressed inks to create the base. I then stamped in black a few details and the technique I was most excited about was using Perfect Pearls. I had some sudo ones that I really love and when I saw Tim use Perfect Medium to adhere perfect pearls I was hooked.

Of course that meant buying some perfect medium but I think it was an investment well spent. All you need to do is stamp the image in perfect medium then dump some perfect pearls on it and use a fan paint brush to brush off the excess.

The numbers 3 and 1 were from a stamp set I bought many years ago and in fact I just recently got rid of the alphas but forgot about the numbers because I kept them separately I am so glad I did because they really work great on this tag.

I also am a huge fan of black/orange plaid ribbon but its so hard to find in less than 1 inch but I just folded over my wide ribbon and adhered it to the tag with some hot glue.

A few punches from QK, vintage HW paper pad I picked up the expo from Authenique and then I experimented with this fun black sparkling glitter from Judikins. I wondered how embossing would work on vellum, a risk I decided to take and am pretty happy on how it came out although it's hard to capture the sparkle with a camera.

Monday, August 15, 2016

Disney Project Life

I went to the Expo last weekend, can't say I accomplished a whole lot but did enjoy the fun time.

I also have had visitors so my craft room has been given up for our company which means alas not much time spent in there.

I did manage to work on some of my project life. I still haven't done my DD and I hope I can accomplish that before this year's December.

These pages are from my most recent visit with the grandkids. I didn't embellish the pictures that much, sometimes I think a picture is beautiful just as it is. As you can see I still need to do my journaling. I think I need two or three expos or some sort of crop event where I can just sit and get things done away from day to day interruptions.


Wednesday, August 10, 2016

Stampscapes -Let It Snow

Since I had been on a roll making Christmas cards I have been wanting to make this card forever, and I do mean forever. Stampscapes were one of the first stamps I purchased besides Stamping Up and that was a good fifteen years or so ago . I love these scenes but little did I know how many stamps and inks one needed to assemble this.

Happy to say I finally have gotten everything I need and viola my first ever truly completed Stampscapes card. I plan on sending this to my Father in law since this is almost his home exactly. I am pretty sure he's gonna love it.

Monday, August 8, 2016

Vitnage - Merry and Bright

 
For this card I bought some of Tim Holtz resist cardstock. I admit it's kind of fun to alter. I never would have given this a second thought having seen it, but I guess if I was into the grunge antique look then I would know more about those products.
 
On this card, I just used the antique linen paint to white wash it then added in the distressed inks and then same thing swiped it with a wet towel.
 
The deer die was given some glitter from Martha Stewart then I die cut the holy leaves from Penny Black, punched out some berries and finished it with a metal heat embossed die cut. 


Wednesday, August 3, 2016

Vintage - Joy

On to my second technique, this one I really like. Basically you use his paint as a resist. I used the antique linen paint to stamp some script onto a card then you add in the distress ink. Then to bring the stamped antique linen color out you wet a towel and rub it over the stamped image and like a heat emboss resist the images or in this case the script text pops out.

I tried some other techniques but didn't care for them and as I mentioned before it just wasn't my style.

Most of what I do seems to be creating backgrounds but I do like the look of this for another vintage card. Keeping my theme of Christmas I added in some snowflakes, a stamped banner and bits of flowers and leaves. I also added in a trio of stick pins and the Joy die cut from Papertrey Ink which I used glitter cardstock as the back layer of the sentiment.


Monday, August 1, 2016

Vintage - Merry Christmas

Well I know it's insanely early to be thinking about Christmas cards and normally I wouldn't even be giving it more than a thought, but alas my bff gifted me 3 Tim Holtz classes on onlinecardclasses.com

I have taken the first two and the third starts this week which is a live class. The other two were self study. I have to say the first one really goes into depth about all the distress products and the difference between them and demonstrates which ones do what. Very informative and of course very enabling. I did go buy some more inks and a few stains.

Then I took the second class which IMO is just a more casual repeat of the first. You do get to see Tim create more tags with the products which gives you ideas on creating with them, more enabling and I went and bought some paint. Now I will confess to you that almost everything else he used which was a lot I already owned. Nice to see alcohol inks being used because years ago I bought that and then realized I didn't really care that much for them, until these classes. Now I am trying to debate do I really need more of them.

I finally got all my supplies and proceeded to start playing with them. As I started to get through some techniques it was apparent to me why I stopped buying and creating the whole distress/grunge look. It's just not my style. Now I feel like a sucker having bought more of the distress products and am committed that I will use them. So doing what I know I love I decided to go vintage with some of my Halloween and Christmas cards because I love love love the vintage look of these two seasons.

So my first attempt was to go and create tags but then I realized why am I making tags, I don't normally use them, so I quickly changed from tags to cardstock in the size of cards rather than the tags. But I started a tag so I didn't want to waste it.

This is just the basic distress ink type of technique. I did use the Picket Fence stain to white wash the tag then added in his distress inks, then stamped it. Then thinking hey I can mist some water on it, I realized what it did was pull that white picket fence stain to the forefront which gave me a washed look. I then used some metallic embossing ink for the sentiment and added all the other bits of pieces to create the card.